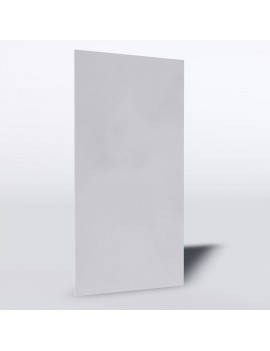
ALÇIPAN PLAKA 120x2,5cm YEŞİL
ALÇIPAN PLAKA 120x2,5cm YEŞİL
| Üretici: | KYK |
| Ürün Kodu: | 0012549596790 |
| Stok Durumu: | 1 |
-
$4,58
- KDV Hariç: $4,16
ALÇIPAN PLAKA 120x2,5cm YEŞİL *
Standart Alçı Plaka (R); düzgün yüzeyli, esnek ve hafif alçı plaka çeşididir. Ön yüzü fildişi, arka yüzü gri renkli kağıt kaplıdır.Çeşitli boyutlarda üretilen Standart Alçı Plaka iki ayrı kenar şekli seçeneklerine sahiptir.
Sunduğu Avantajlar:
Hızlı, temiz ve kuru bölme duvarı, asma tavan imali ve kaplama, Planlama ve kullanım açısından yüksek esneklik, Mekanik ve elektrik tesisatı montajında kolaylık,Yüksek ses ve ısı izolasyonu elde etme, Yapılarda yangın direncinin arttırılması,Hafif, depreme dayanıklı bölme duvarları elde etme olanağı sağlar.
Kullanım Alanları:
Asma tavan,Bölme duvar,Duvar giydirme,Kuru sıva duvar,
Kalınlık: kaplamaAsma tavan,Bölme duvar,Duvar giydirme,Kuru sıva duvar,
Kalınlık: kaplama
Kalınlık: Ağırlık: Uzunluk: Genişlik: Ürün Standardı:120x250x12.5cm
Alçı Plakaları ile Bölme Duvar Yapılması Ön Hazırlıklar
• Döşeme ve tavan üzerinde bölme duvarı yeri titizlikle işaretlenir.
• Alçı plakaları taşıyacak olan galvanize saç profiller (Duvar U ve C) yapılacak duvar ölçülerine uygun olarak kesilir.
• Montaj kolaylığı açısından, dikme olarak kullanılacak duvar profillerinin, mevcut tavan yüksekliğinden 1 cm daha kısa olacak şekilde kesilmesine dikkat edilmelidir.
• Alçı plakalar mevcut tavan yüksekliğinden 1.5 cm kısa olacak şekilde kesilerek montaja hazır hale getirilir.
Duvar Profillerinin Montajı
• Hazırlanan metal U profiller döşeme ve tavana dübel + vida veya özel ankraj elemanları ile tespit edilir.
• Dikme olarak kullanılacak duvar C profilleri, mevcut duvar yüzeyinden başlamak üzere ve 60 cm aks aralığı korunarak, U profillerin arasına serbest olarak yerleştirilir.
• Yapılacak duvar yüzeyine seramik, mermer vb. kaplama yapılacak ise, profillerin aks aralığının 40cm’den fazla olmamasına dikkat edilmelidir.
• Dikme olarak kullanılacak duvar C profillerinden ilki mevcut duvara sabitlenir. Diğerleri, muhtemel hataları önlemek için, alçı plaka montajı sırasında sabitlenmelidir.
Alçı Plakaların Montajı
• Hazırlanan alçı plakalar, döşeme ile 1 cm boşluk bırakılarak, taşıyıcı konstrüksiyonun bir yüzünden ve bütün bir plaka ile başlamak üzere kenar hatları boyunca vidalanır.
• Plakaların orta dikmeler ile bağlantısı, diğer yüzdeki plakaların montajından sonra yapılmalıdır.
• Vida aralıklarının en çok 25 cm olmasına ve vidalamanın plakaların kenarlarına 1 cm’den daha yakın yapılmamasına dikkat edilmelidir.
• Alçı plakalar C profillerin yan yüzlerini ortalayacak şekilde yanyana getirilmeli ve aynı profil üzerindeki birleşme yerlerindeki vidalar şaşırtmalı olmalıdır.
• Duvar boşluğunda yer alacak tesisat işlemleri tamamlandıktan sonra, diğer yüzdeki plakaların montajına yarım plaka ile başlanır. Böylelikle iki tarafta derzlerin karşılıklı gelmemesi sağlanmış olur. Bu yüzdeki plakalar, arkalarındaki profillerin tamamına vidalanır.
Derz Dolgularının Yapılması
• Derz Dolgu Alçısı, torba üzerinde tarif edildiği şekilde harç haline getirilip plakaların birleşim yerlerindeki derzlere spatula ile doldurulur.
• Derzlerde oluşabilecek çatlakları önlemek için gerekli olan derz bandı, spatula yardımıyla, derz dolgu alçısının üzerine bastırılarak yerleştirilir.
• İlk dolgunun prizini almasından sonra, yeni harç ile derzlerin son dolgu ve rötuşları yapılarak duvar montajı tamamlanmış olur.
Alçı Plakaları ile Asma Tavan Yapılması
Asma Tavan Konumunun Belirlenmesi
• Yapılacak asma tavanın alt kodu belirlenerek çevre duvarlarının üzerine işaretlenir.
• Mevcut veya yapılması planlanan çeşitli tesisat donanımının yerleri dikkate alınarak, duvar kenarından 10 cm açıktan başlamak ve en çok 90 cm aralıklı olmak üzere, tavanda askı çubuk hatları işaretlenir.
Taşıyıcı Konstrüksiyonun Kurulması
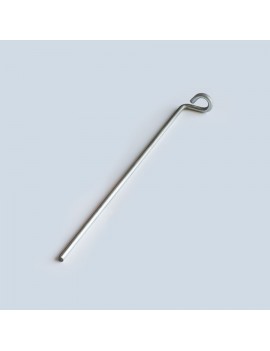
• Amaca uygun boydaki askı çubukları, belirlenen hatlar üzerinde ve en çok 110 cm aralıklarla tavana sabitlenir.
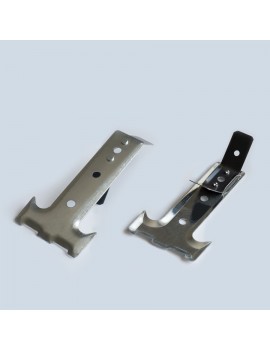
• Ana taşıyıcı olarak görev yapacak tavan C profilleri, askı maşası yardımıyla askı çubuklarına uygun kotda bağlanır.
• Ana taşıyıcı profillerin terazisinde olup olmadığı kontrol edilir, askı maşası yardımı ile gerekli düzeltmeler yapılır.
• Ana taşıyıcı profil uçlarına rastlayan duvarlara, duvar çevre profilleri (detayına uygun olarak L veya U profili) sabitlenir ve ana taşıyıcı profiller ile bağlantısı yapılır.
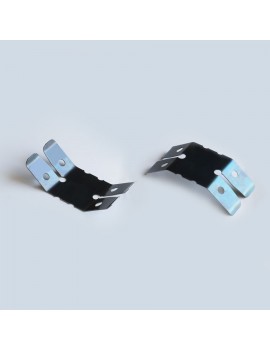
• Alçı plaka taşıyıcı profilleri olan tavan C profilleri ana taşıyıcı profillere dik istikamette klipslerle bağlanır.
• Alçı plaka taşıyıcı profillerin aks araları, seçilecek plaka tipine veya plakaların dizilme yönüne göre 40 cm veya 50 cm olmalıdır.
Alçı Plakaların Montajı
• Amaca uygun tipteki alçı plakalar, dikmeler veya taşıyıcı sehpa yardımıyla duvarın bir kenarından başlanarak profillere yanaştırılır ve vidalanarak tespit edilir.
• Alçı plakalar, C profillerinin alt yüzlerini ortalayacak şekilde yan yana getir

-270x351.jpg)
